How I built this website? - Jekyll and AWS (Part 1)
Welcome to my first article. This will show you how I setup, manage and publish my blog website to the internet. I’m using Jekyll as an open source for technical writing using Jekyll theme.
While setting up my website, I decided to use S3 and CloudFront for hosting instead of GitHub Pages. I thought it would more professional. There’s a lot more to learn, and feel cooler 👏. After doing some research, I wrote this article to help others (including my future self) with the setup process.
Requirements
I have setup this page with some bellow requirements:
- Use Static Jekyll site
- Source control with Github
- Hosted in an AWS S3 bucket without enable
Static website hosting - Use AWS Cloudfront as a CDN
- Use AWS Route53 as DNS
- Automatic publication via Github Action
Now lets go over step by step
Creating the S3 Bucket
- Go to your AWS account and create your S3 bucket. In my demo case, I named the bucket is “my-jekyll-static-website”
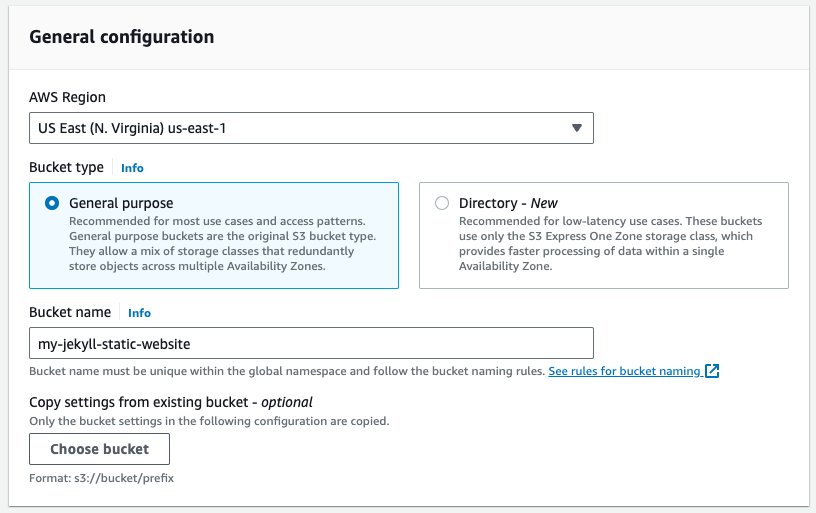 Create S3 Bucket
- (Option) You can enable the feature “Bucket Versioning”, anything else can set as default
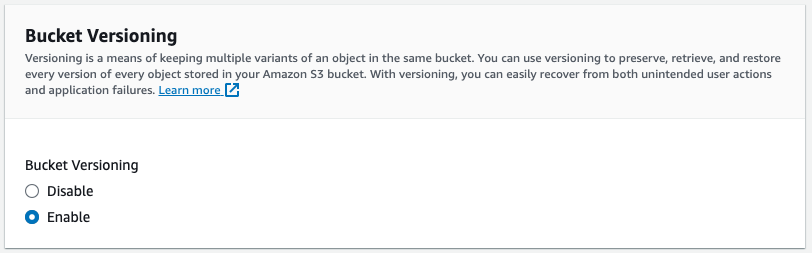 Enable Bucket Versioning feature
- After the bucket is created with the above settings, create a simple index.html file and use the “Objects” tab to upload it to your bucket.
1
2
3
4
5
<html>
  <body>
    <h1>Hello World!</h1>
  </body>
</html>
- You can not be able to access the file using the Object URL because the bucket wasn’t public, so it very secure. You need to use AWS Cloudfront distribution to access this bucket
Configuring CloudFront
Next, setup a CloudFront distribution to point to your S3 bucket.
When configuring the “Origin domain”, select the S3 bucket you just created.  Cloudfront origin domain
Create Orgin Access Control - OAC for that distribution. You will see the warning that ask you update the S3 bucket policy. You can copy the policy statement provided by CloudFront after creating the distribution, then update it into S3 bucket policy  Cloudfront warning
The Alternative doamin name (CNAME) and Custom SSL certificate is very important for HTTPS setup. But we will update it later  Alternative doamin name and Custom SSL certificate
Next, make sure the following settings are configured:
| Viewer protocol policy | Redirect HTTP to HTTPS |
| Allowed HTTP methods | GET, HEAD |
| Restrict viewer access | No |
| Default root object | index.html |
Everything else can remain the default setting.
Once the distribution is created and deployed, you should be able to access the HTML in the S3 bucket by using the distribution’s URL. In the “Details” section there is a “Distribution domain name”. Use this domain name in your browser to test it out. It should look something like:
https://<distribution-id>.cloudfront.net
Make sure you see the “Hello World!” message from your HTML file before continuing to the next step.
Configuring AWS Route53 as Domain Name Server
Next, we will register domain at Route53. This action will cost you a bit money because you will buy the domain from AWS. Then you will wait about 1 or 2 days that AWS will verify and setup your Hosted zone.
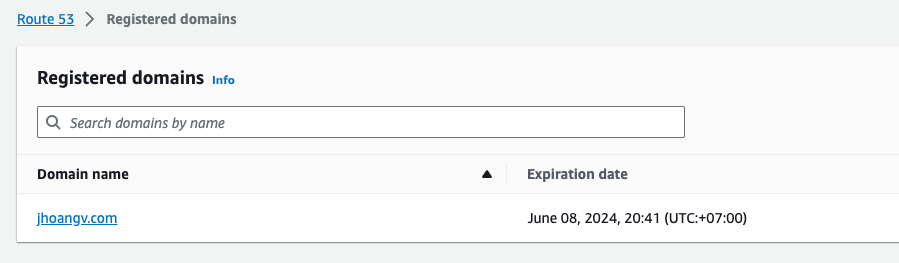 Route53 Registered domains
Next, we’ll use AWS Certificate Manager to create an SSL certificate and configure your domain to point to the CloudFront distribution.
Navigate to AWS Certificate Manager (ACM) and request a new certificate. Enter the domain name and select “DNS validation” for the “Validation method”. After you request the certificate, it is in a “pending” state until validated.
 ACM Certificates
You should create a record in Route 53 so that ACM can verify you DNS. Go to the detail of Certificate, under
Domainssection, you can see theCreate records in Route 53
Updating the SSL Certificate in CloudFront
As I mentioned, we should update Alternative doamin name (CNAME) and Custom SSL certificate to get HTTPS works. Navigate to the AWS distribution created above and click the “Edit” button under the “Settings” section. In the “Alternate domain name (CNAME)” section add your domain name. Then under “Custom SSL certificate” you should be able to select your newly created certificate from the drop-down.
 CloudFront Alternate Domain and SSL certificate
Then, we need to create the record in the Route53 that using for the Cloudfront. We should enable Alias and choose Alias to CloudFront distribution and point to your distribution.
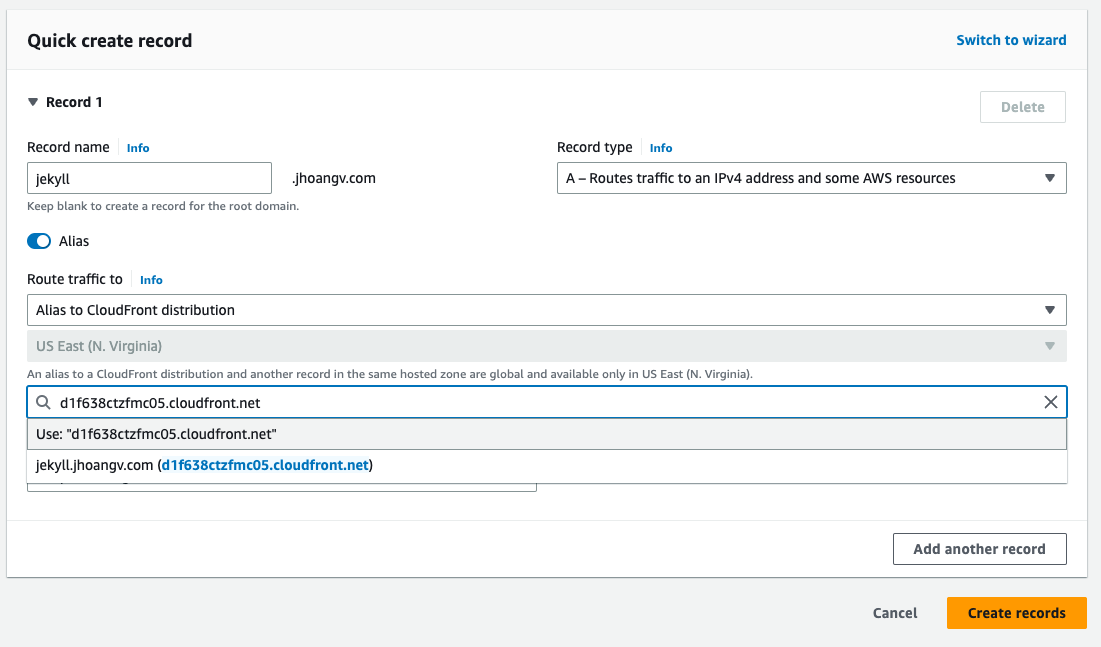 Route53 Jekyll Record
After everything is ok, click Create records. You will see in Records dashboard has:
| Record name | Type | Routing Policy | … | Alias | Value/Route traffic to | TTL |
|---|---|---|---|---|---|---|
| jekyll.jhoangv.com | A | Simple | … | Yes | distribution_id.cloudfront.com | 300 |
Again, after the settings have been configured, verify you can see the HTML page by navigating to your custom domain in the browser. For this demo, I’m using https://jekyll.jhoangv.com/
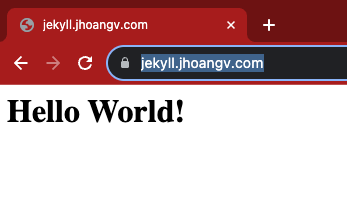 Output
The
https://jekyll.jhoangv.com/is no longer accessible since I have concluded this series. Don’t worry about the final output, it is similar to this page. I’ll make sure to share all the knowledge with you.
In next article, I will show you how to setup the Jekyll source on github, and using Github Action as the CI/CD to automatic build the code and deploy to the AWS. So please wait and feel free to give me your comment via ngahv2222@gmail.com or linkedin if you have any concerns.
This is the first time I write a sharing article so your comments are my motivation. Thanks!
Update: In 6 Jan 2024, I changed my domain from
blog.jhoangv.comtongahoangdev.com.
References
Here are a couple other articles that were helpful in getting this setup: